Sunday 28 October 2012

How to support paging of data in your Visualforce Pages.

A while back I was working on a project in which I had to a design a search interface for my Custom object. The search result could get pretty big at times and I always needed to over come the limitations and show large number of rows in the screen.

At that point I was like "gee if I could use Paging with the pageBlockTable tag" and then I decided to write it myself. So here is goes:

As we all know we should have two pieces of code, one for the Controller and the other is for the page tags.


The whole idea here is to create two lists on the controller object which one keeps the original records (all records) and the second one temporarily keeps only what should be shown to the user.
With defining a few parameters such as Total Pages, Current Page Number and Page size I managed to simulate paging successfully.

Here is what goes to the page:


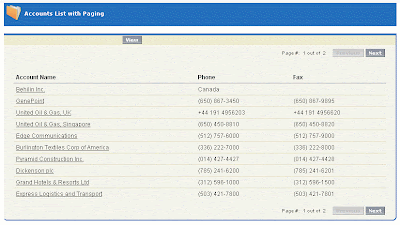
<apex:page controller="MyPagingController" tabStyle="Account">
<apex:sectionHeader title="Accounts List with Paging"></apex:sectionHeader>
<apex:form >
<apex:pageBlock title="" id="pageBlock">
<apex:pageBlockButtons location="top">
<apex:commandButton value="View" action="{!ViewData}" id="theButton" rerender="pageBlock"></apex:commandButton>
</apex:pageBlockButtons>
<apex:pageMessages ></apex:pageMessages>
<div align="right" style="display:{!IF(NOT(ISNULL(accounts)),'block','none')}">
<font size="1pt">Page #:&nbsp;<apex:outputLabel value="{!PageNumber}"/>&nbsp;out of&nbsp;<apex:outputLabel value="{!totalPageNumber}"/>&nbsp;&nbsp;&nbsp;&nbsp;</font>
<apex:commandButton value="Previous" action="{!previousBtnClick}" disabled="{!previousButtonEnabled}" reRender="pageBlock"></apex:commandButton>
<apex:commandButton value="Next" action="{!nextBtnClick}" reRender="pageBlock" disabled="{!nextButtonDisabled}" ></apex:commandButton>
</div>
<br/><br/>
<apex:pageBlockTable value="{!accounts}" var="a" rendered="{!NOT(ISNULL(accounts))}" rows="{!PageSize}">
<apex:column >
<apex:facet name="header">Account Name</apex:facet>
<apex:outputLink value="/{!a.Id}" target="_blank">{!a.Name}</apex:outputLink>
</apex:column>
<apex:column value="{!a.Phone}"></apex:column>
<apex:column value="{!a.Fax}"></apex:column>
</apex:pageBlockTable>
<div align="right" style="display:{!IF(NOT(ISNULL(accounts)),'block','none')}">
<br/>
<font size="1pt">Page #:&nbsp;<apex:outputLabel value="{!PageNumber}"/>&nbsp;out of&nbsp;<apex:outputLabel value="{!totalPageNumber}"/>&nbsp;&nbsp;&nbsp;&nbsp;</font>
<apex:commandButton value="Previous" action="{!previousBtnClick}" disabled="{!previousButtonEnabled}" reRender="pageBlock"></apex:commandButton>
<apex:commandButton value="Next" action="{!nextBtnClick}" reRender="pageBlock" disabled="{!nextButtonDisabled}" ></apex:commandButton>
</div>

</apex:pageBlock>
</apex:form>
</apex:page>


Below is the code for Controller:


public class MyPagingController {
private List accounts;
private List pageAccounts;
private Integer pageNumber;
private Integer pageSize;
private Integer totalPageNumber;
public Integer getPageNumber()
{
return pageNumber;
}
public List getAccounts()
{
return pageAccounts;
}
public Integer getPageSize()
{
return pageSize;
}
public Boolean getPreviousButtonEnabled()
{
return !(pageNumber > 1);
}
public Boolean getNextButtonDisabled()
{
if (accounts == null) return true;
else
return ((pageNumber * pageSize) >= accounts.size());
}
public Integer getTotalPageNumber()
{
if (totalPageNumber == 0 && accounts !=null)
{
totalPageNumber = accounts.size() / pageSize;
Integer mod = accounts.size() - (totalPageNumber * pageSize);
if (mod > 0)
totalPageNumber++;
}
return totalPageNumber;
}
public MyPagingController()
{
pageNumber = 0;
totalPageNumber = 0;
pageSize = 20;
ViewData();
}
public PageReference ViewData()
{
accounts = null;
totalPageNumber = 0;
BindData(1);
return null;
}
private void BindData(Integer newPageIndex)
{
try
{
if (accounts == null)
accounts = [Select id, Name, Phone, Fax from Account limit 1000];
pageAccounts = new List();
Transient Integer counter = 0;
Transient Integer min = 0;
Transient Integer max = 0;
if (newPageIndex > pageNumber)
{
min = pageNumber * pageSize;
max = newPageIndex * pageSize;
}
else
{
max = newPageIndex * pageSize;
min = max - pageSize;
min = (min <>
}
for(Account a : accounts)
{
counter++;
if (counter > min && counter <= max)
pageAccounts.add(a);
}
pageNumber = newPageIndex;
if (pageAccounts == null || pageAccounts.size() <= 0)
ApexPages.addmessage(new ApexPages.message(ApexPages.severity.INFO,'Data not available for this view.'));
}
catch(Exception ex)
{
ApexPages.addmessage(new ApexPages.message(ApexPages.severity.FATAL,ex.getMessage()));
}
}
public PageReference nextBtnClick() {
BindData(pageNumber + 1);
return null;
}
public PageReference previousBtnClick() {
BindData(pageNumber - 1);
return null;
}
}

Friday 19 October 2012

How to import attachments using Apex Data Loader?


Steps to import attachments using Apex Data Loader are
  1. Create an AttachmentLst.csv file with the following column headers:
·         ParentId - ID of the record to which the attachment should be associated  
·         Name - Name of the attachment  
·         ContentType - Format of the extension (e.g. .xls, .pdf, etc)  
·         OwnerID - ID for the owner of the attachment 
·         Body - File path to the Attachment on your local machine (C:\Attachments\FileName.jpeg)
  1. Log in to the Data Loader. 
  2. Select the "Insert" command.
  3. In the 'Select Sforce Object' step, select the ‘Attachments’ object. This object is not displayed by default hence check the ‘Show all Sforce Objects' checkbox. 
  4. Choose the AttachmentLst.csv file. 
  5. In the mapping step, map the following fields:
·         Parent ID 
·         Name 
·         Owner ID 
·         Body - Make sure to map the Body column which you created previously with the file extension. This is how you designate the file and location of the attachments to be inserted. 
                  7. Click "OK" to start the upload.

Saturday 13 October 2012

AUTO REFRESH DASHBOARDS

Auto Refresh Dashboards every time you click the Home Tab.

Tired of seeing the wrong numbers displayed on the Dashboard? Oftentimes, users forget to hit the refresh button on the Home Page Dashboard. This can result in Salesforce users seeing inaccurate data which can be confusing and frustrating. This TIP will help keep your Dashboards refreshing with the most up to date information.

Go to the setup menu:
Click customize, Home, Homepage Components.
Edit Messages and Alert.
Paste this code anywhere in the data entry box:
<script type="text/javascript"> var run; function sa_refresh() { var dashboardButton = document.getElementById("db_ref_btn"); dashboardButton.click() } setTimeout(sa_refresh, 5000); //Runs the Refresh function every 5 minutes using Milliseconds (1minute = 60000) run = setInterval(sa_refresh,300000); </script>

SAVE.
The code will refresh the dashboard every time you click the home tab or every 5 minutes.

Sunday 7 October 2012

How to use 'Schema- Builder' in Salesforce

Hi All,  while working with salesforce we have to deal with many S-Object and Custom-Objects.we need to set up relation ship (Master/Lookup) among these all.But to keep this relation-ship in mind is very typical.
 To get a rid of this problem Salesforce has provided it's new tool "Schema-Builder".

Specification:-
--------------
In Schema Builder We may observe relation ship among many objects.Different different color lining are used to make it clear and out of any sort of technical-dilemma.
to configure
1.)go to Set up ->App setup->where you will easily 'Schema builder' link.

2.) click on this link you will be redirected t new Page with schema home page where you will get a list of objects.
3.) Select object to view pre-defined relationship among them.

How to Use ANT in salesforce

Hi friends here We will learn How to deal with deployment process using ANT. If you have ANT then fine
other wise download apache-ant-1.8.2 or higher version and go through these steps for installing ANT.
Step 1 Download apache-ant-1.8.2-bin from Web.
step 2 install jdk1.6.0_25 or higher version.
Step 3 go to run command use command sysdm.cpl press "advanced" tab then press "environment variable" tab then press on
tab "New"

create two variable ANT_HOME and JAVA_HOME
ANT_HOME D:\apache-ant-1.8.2-bin\apache-ant-1.8.2 (if your ant folder is in D- drive)                    
JAVA_HOME  C:\Program Files\Java\jdk1.6.0_25 (give path of jdk)

PATH %SystemRoot%\system32;%SystemRoot%;%SystemRoot%\System32\Wbem;C:\ProgramFiles\Java\jdk1.6.0_25\jre\bin;D:\apache-ant-1.8.2-bin\apache-ant-1.8.2\bin;
(if path variable is alreadyavailable then append this also other wise create new Path variable)

for more detail go to
http://ant.apache.org/manual/index.html

Now we move to "How to Use ANT for deployment in Apex"

for this Process
1) First of all create package.xml(depends requirement )
2) And Use build.xml and
3) build.property (change credential according to your requirement)

Tuesday 2 October 2012

How to be Sucessful with Salesforce

Name: How to be Sucessful with Salesforce.

Release: Spring 12

Pages: 3611

                                        Download link

Monday 24 September 2012

How to configure Web-to-Lead


Web-to-Lead is a cool often overlooked native feature in Salesforce.com. It simply allows a way for you to create a Lead record in your Salesforce.com instance from a form you publish on your website. You’ve seen the concept before on websites across the web – fill in some quick information such as First Name, Last Name, Company Name, and Email Address and click “Submit.” Maybe this information was required to download a white paper or make a “please contact me” request. The use cases are multiple, but the concept is the same. A visitor on your website is submitting contact information on your website and that submission creates a record as a Lead in your Salesforce.com instance. It’s a way to get feedback on your product and services or grow your marketing database.
So how do you pull this off? It’s not nearly as hard as you might think to get the basic HTML code out of Salesforce.com. Taking the basic code and making it look nice and have on-page field validation is a whole other discussion (which you will need to have with your webmaster).
Here is the basic step-by-step on how to generate a Web-To-Lead form in Salesforce.com
Setup > App Setup > Customize > Leads > Web-to-Lead
Web-to-Lead Setup
On the page presented you’ll see there are only two options: a button to Edit the Settings displayed and another to Create your Web-to-Lead Form. First let’s review the settings.
Web-to-Lead Enabled checkbox – you guessed it, you can’t receive a Web-to-Lead submission unless this is checked.
Default Record Creator – the User in your Salesforce.com that will be listed in the “Created By” field on the Lead record. In most cases this will be the Lead Record Owner, but if configured, Lead Auto-Assignment rules may change the ownership. Also this will be the User that will send out the Default email response template (see below) unless Auto-Response Rules are configured – keep reading!
Default Response Template – this is a one-size fits all email template with no logic available. This will need to be created based on your business need (i.e. should the communication be a “thank you” for requesting information on your website, a confirmation that their information was received, or does it need to communicate any further action, etc). If you need a different email sent to the Lead submitted based on how the submitter filled out the Web-to-Lead form, then you will need to keep this option blank and go to Setup > App Setup > Customize > Leads > Auto-Response Rules and configure your Auto Response Rules. For example, say that your Web-to-Lead form allows customers to request information about three different products you offer:  Product A, Product B, and Product C. If the Web-to-Lead form has a pick list called “Product” with the aforementioned options, when someone submits a Lead with “Product A” requested, you can have the Auto-Response Rule evaluate the record, and define logic that says when you see the Product field has a value of “Product A,” send the email with the “Product A” datasheet. There are some additional best practices for Auto-Response Rules (which are configured in the same way as Case Auto-Response Rules by the way), but that’s a separate discussion.
Ok, now let’s check out that other button called Create your Web-to-Lead Form.
In the next window you’ll see a pick list chooser interface up top and a field on the bottom called Return URL.
The fields available in the chooser column on the left are all the native and custom fields available on the Lead Object. In my screen shot below, you’ll notice I added the custom field called “Product Interest” to some of the default native Lead fields. You will need to keep the “Email” field, otherwise you’re default email, or Auto-Response Rule email can’t fire ;) . As a best practice, keep the amount of fields down to a minimum. The more data you’re request from visitors on your website, the less submissions you can expect.
In the Return URL you will want to specify the page on your website you want the visitor to see after they submit your Web-to-Lead form. I recommend creating a “Thank-you” page on your website that can only be found after submitting your form (i.e. not in your main navigation and not part of your site index). This gives confirmation to the person submitting the form that the action occurred and the submission was processed successfully – i.e. “we got it!” This is a nice back-up in case the email gets caught in the submitter’s spam filters. At a minimum redirect them to the home page of your website.
Select Fields and Generate
OK, time to click that oh-so-curious looking button at the bottom of the page called “Generate.”
That my friend, is your web-to-lead form in its crudest HTML form. First let’s break down what was generated, then let’s test it.
The top part is commented out HTML tags with instructions for your webmaster on where the HTML should nest on a page.
The first interesting piece of code is the tag “form action=”, yep, it’s a form submission. Immediately after that you’ll see to VERY important pieces of information (highlighted below). The OID value (shorthand for Organizational Wide Default) is your instance of Salesforce.com. That doesn’t show up in very many places, but if you navigate to Setup > Administration Setup > Company Profile > Company Information – you’ll see your OID listed as a field on that page as well.
Web-to-Lead OID
Web-to-Lead OID
What this section of the form is saying is that this form submits to Salesforce.com and directs the record to this instance (OID) of Salesforce (like an address on a piece of postal mail).
The “retURL” is the Return URL that we configured earlier. After the form is submitted, where (what page) do you want me to send the submitter?
The next little section of code can be uncommented to allow a debug function to occur. If the debug value is set to “1” you will see a confirmation after you submit your lead like the one below. You will want to remove this once you go live – it’s just for testing.
Debug Code
Debug Code
Debug Confirmation
The rest of the HTML presented are the tags describing the Lead fields you made available on your form. Not much to comment on here as there is enough description for even for the non-HTML fluent to figure out.
So are you ready to see this work? Fire up your extremely expensive and feature rich HTML editor that came with your computer…. commonly known as “Notepad.” Highlight and copy the HTML out of Salesforce.com and drop it into a new Notepad document.
Drop HTML Into NotePad
Do a “File > Save As” command and when you save the file, be sure to rename the file extension from “.txt” to “.html” and save it on your desktop (or somewhere you can find the file easily).
Save As HTML for Testing
Find the file and double click it
W2L File On Desktop
W2L File On Desktop
Yep, that’s your Web-to-Lead form! OK, it’s not very sexy, but it is functional. Your webmaster will need to format the page and include things like field validations and error messaging (e.g. validate that an email address has the right syntax –it has an “@“ sign and a “.domain” at the end).  As long as your computer is connected to the internet, fill out the form and click the “Submit Query” button at the bottom of the form.
Submit W2L
Submit W2L
If you configured the “debug” option as aforementioned, you’ll see the debug confirmation displayed. If not, you’ll be redirected to the URL that you specified earlier.
OK, the moment of truth. Log into Salesforce.com and check to see if your Lead came across – ta da!
Lead Comes Into SFDC
Things to note:
Unless requested otherwise, you will have a limit of 500 Web-to-Leads a day. If you need more, contact your rep and plead your case. I can confirm from my own experience that limit can be raised for valid reasons. If you exceed 500 Leads in a single day, Salesforce.com willemail you the Web-to-Lead records as they come across (Lead by Lead!). This is a REAL drag as the data has to be manually entered into Salesforce from the email – so watch your daily volumes! At least you won’t lose any data. If you have a website that is regularly submitting more than 500 records a day, consider developing a solution that uses the API.
Can you have multiple pages on your website running Web-to-Lead code and sending Leads into your Salesforce.com org? Absolutely. Here’s a tip. If you want to know which page on your website sent the Lead, make a field in your org called “Website URL” and in your HTML code, populate the field with the URL that has your web-to-lead form. Make it a hidden field (don’t display it on the page). When the Lead record gets submitted from your website the form will pass that URL value to Salesforce so you can know which page submitted the record. Slick!

Sunday 16 September 2012

Creating a multilevel dependent picklist on Visualforce inside a Data table

Recently on working on a project I cam across a serious issue, creating a multilevel picklist with N-Level dependency.
e.g., Picklist one, select option, picklist two displays related values, select a value and the data for Picklist 3 are filtered based on picklist 1 and 2 and this goes on.
Lets increase the complexity a bit, you want to have this functionality in a data table with multiple rows.

The code for this seems tricky, but I did manage to write some.

The trick is create a wrapper class within you Apex:Class and bind it with the SelectList.

VF Page:


<apex:actionRegion >
<apex:pageBlockSection id="theSection" rendered="{!noLob}"> 
<apex:dataTable value="{!packages}" var="field" id="thetable" cellpadding="3px" id="dt">
<apex:column headerValue="Action">
<apex:CommandButton action="{!copyRow}" value="Copy" rerender="theSection" status="pleasewait">
<apex:param name="Assignment" Assignto="{!SelIndex}" value="{!field.index}"/>
</apex:CommandButton> 
</apex:column> 
<apex:column headerValue="Product Group">
<apex:selectList value="{!field.level1}" size="1" >
<apex:selectOptions value="{!field.level1Options}" /> 
<apex:actionSupport event="onchange" reRender="level2" status="pleasewait"> 
</apex:actionSupport>               
</apex:selectList>   
</apex:column>   
<apex:column headerValue="Products" >  
<apex:selectList id="level2" value="{!field.level2}" size="1" disabled="{!field.disable_level2}">
<apex:selectOptions value="{!field.level2Options}"/>     
</apex:selectList>  
</apex:dataTable>
And now the controller:

public class AddNewProductsController { 
public class myObject{
 public string level1 {get;set;} // The selected Level1 value in the Product Picklist on the modal panel
 public string level2 {get;set;}// The selected Level2 value in the Product Picklist on the modal panel
 public boolean disable_level2{get;set;}// The determines if Level2 value in the Product Picklist is disabled
 public boolean disable_level3{get;set;}// The determines if Level3 value in the Product Picklist is disabled
 public boolean FormRendered{get;set;}
 public myObject(){
 }
 public List getLevel1Options(){
 List options = new List();
 Options.add(new SelectOption('','--None--'));
 Options.add(new SelectOption('Product Group 1','Product Group 1')); 
Options.add(new SelectOption('Product Group 2','Product Group 2')); 
 Options.add(new SelectOption('Product Group 3','Product Group 3')); 
 Options.add(new SelectOption('Product Group 4','Product Group 4')); 
 return options;
 }
 
 public List getLevel2Options(){
 List options = new List();
 System.debug('==========='+level1+'%%%%%%%%%');
 options.add(new SelectOption('', '--None--')); 
 disable_level2=false;
 
 if(level1 == 'Product Group 1'){
 options.add(new SelectOption('Product1', 'Product1'));
 options.add(new SelectOption('Product2', 'Product2'));
 }else if(level1 == 'Product Group 2'){
 options.add(new SelectOption('Product1', 'Product1'));
 options.add(new SelectOption('Product15', 'Product15'));
 }else if(level1 == 'Product Group 3'){
 options.add(new SelectOption('Product2', 'Product2'));
 options.add(new SelectOption('Product23', 'Product23'));
 }else if(level1 == 'Product Group 4'){
 options.add(new SelectOption('Product16', 'Product16'));
 options.add(new SelectOption('Product12', 'Product12'));
 }else if(level1 == 'Product Group 5'){
 options.add(new SelectOption('Product16', 'Product16'));
 options.add(new SelectOption('Product1', 'Product1'));
 }else{
 disable_level2=true;
 }
 return options;
 }
}

This code will do your trick.

Displaying please wait ajax animation on Visualforce page

Many times there comes a need to display a please wait icon while doing a ajax call on a VF page. This also looks cool for UI.

The beauty of VF page is, large things can be achieved with small efforts. Here is a three line of code that will help you achieve the flower.


<script>
        // To show / hide waiting-flower icons
        function setVisibility(id, isVisible){
            document.getElementById(id).style.visibility= isVisible ? 'visible' :  'hidden';
           
        }
       
        function show(id){setVisibility(id,true);}
        function hide(id){setVisibility(id,false);}
     
</script>

<apex:actionstatus id="pleasewait" onstart="show('img_status_product_select');" onstop="hide('img_status_product_select');">        
<img height="20px" id="img_status_product_select" src="%7B%21$Resource.AjaxAnimation%7D" tyle="visibility:hidden" width="20px" />

</apex:actionstatus>

Generating Barcode image on Visualforce and Formula Field: Salesforce Code Tip

Can we generate bar-code image on Visualforce? Yes, Can we make it a field on page layout? Also yes.
There are many API's available that help us achieve that. One such API is from http://www.searchupc.com. The API is very easy to use.

Visualforce usage:
1. The {!variable} will possibly be the SobjectVariable ({!sobject.fieldname}) or some {!variable} that stores the UPC code(possibly generated from algorithm.)

The output:


Formula Field Usage:
i) Create a formula field with output as 'Text'
ii) Use the below formula, replacing the mergeField with the field you store your UPC number.

image("http://www.searchupc.com/drawupc.aspx?q="+ mergeField ,"Barcode")

The Output:

Works like a charm.

Word of Caution: 
i) The API accepts only 12 and 13 digit of UPC number. Any other digit and it does not render image.
ii) The data is obviously not secure as we are passing the UPC code as a plain text to the server, there is a risk of packet sniffers.

That is it, displaying Barcode on Salesforce. If you find it useful, don't forget to drop in a comment down there, I wouldn't mind if you would prefer putting your name and comment behind a blank cheque and dropping it to my PO box, well, the method below the post seems easy and cheap no?
 

Dynamic Approval Process on Salesforce

Ever come across the need of a large approval process where you do not know who the approver of the next stage will be? We all do don't we?

In a recent project requirement, I had to work on a big approval process. My basic requirement was:

1. One approval process for child object
2. Once child is approved, it should trigger the master object approval process

Both the approval process had around 5 steps and the approvers where determined by the role hierarchy and the region of the submitter.

Yikes is it?

Pre-requisites:
For this recipe, you need
1. Basic knowledge of APEX and trigger
2. Basic knowledge of Approval process
3. Aspirin (just in case you miss a step and have to debug it!!!)

So lets begin with the Child Object Dynamic Approval process.

Steps for Child Object Dynamic Process
1. Create two fields on the child object. These fields will not be shown on Page Layout.
       i) Approval_step__c: Text field to determine which step the approval is.
       ii) Next_approval__c: A user field to store the approver.

2. Create the approval process.
    i) Initial submission action will be field update: Approval_step__c='Submitted for approval'
    ii) In approver step, select related user and add the Next_approval__c
    iii) In the approval Step Action, field update for Approval_step__c with the next step of Approval. Keep a            note of these keywords.
   iv) Repeat the ii) and iii) till you finish all the approval steps.

3. Write a before update trigger on child object
   i) Check if Trigger.old.Approval_step__c != Trigger.new.Approval_step__c (this is a pseudo code, you will have to iterate through trigger.new and old and compare all values, if you do not know how to do this, add a comment below)
   ii) Now based on the value in Approval_step__c fetch the respective user from Role Hierarchy or anywhere else. Better option would be to use custom settings for this. Add this user in Next_approval__c
   iii) Repeat step ii) till you finish all the approval steps. The final approval step would be to either empty the  Next_approval__c field or set it back to manager of the user.


4. Optional step If you need to trigger another approval process after this.
   i) In the approval process, set the final approval action to 'Approved'
   ii) In the trigger if the field value is 'Approved' then submit the Master in Approval process using Apex Code. (There are many links which give you direct code, the code on my blog will come in next post. )

That's it. It is easily understood that you need to repeat the whole process for master if he needs dynamic approval.
After you done everything, take a deep breath and test your code. If it doesn't the way it should, take an aspirin and debug. Since this uses hand-shake between trigger and approval steps make sure you don't miss out on any step.

It works and I did not need Aspirin, thank God for that.

Note: As this approval process updates back-end, the visual process manager won't be able to visualize it.

Hope it helps,

Easiest AJAX Pagination on Visualforce

There are two ways of writing a code, the hard way and the best way, Of-course the hard way is the easy way and best way if always hard way. If this sentence seems hard to understand, understand it is for the best.

When developing a VF page, the most important we need is pagination, throwing the large chunk of data on user screen is going to give the user goose bump. After trying a dozen method I came to know the easiest way of implementing pagination using standard set controller on a custom controller.

The demo of the code is available here 

The visualforce Page:

<apex:page controller="OpportunityPagination" showheader="false">
<apex:form>
            <apex:pageblock id="ThePageBlock">
                <apex:pageblocktable value="{!opportunities}" var="o">
                    <apex:column value="{!o.name}">
                    <apex:column value="{!o.closedate}">
                </apex:column>
                <apex:panelgrid columns="5">
                        <apex:commandlink action="{!first}" rerender="ThePageBlock"> First</apex:commandlink>
                           <apex:commandlink action="{!previous}" rendered="{!hasPrevious}" rerender="ThePageBlock">  Previous</apex:commandlink>  
                            <apex:outputtext value="Page #{!pageNumber} ">                 
                            <apex:commandlink action="{!next}" rendered="{!hasNext}" rerender="ThePageBlock">Next </apex:commandlink>
                             <apex:commandlink action="{!last}" rerender="ThePageBlock">Last </apex:commandlink>
                     </apex:outputtext>         
            </apex:panelgrid>
           </apex:column>
</apex:pageblocktable>
</apex:pageblock>
</apex:form>
</apex:page>

Apex Controller:

public class OpportunityPagination{ 

    public ApexPages.StandardSetController Con{
        get {
            if(con== null) {
                con= new ApexPages.StandardSetController(Database.getQueryLocator([select name,closedate from Opportunity]));
            }
            con.setPageSize(5);
            return con;
        }
        set;
    }
    
    public List getOpportunities() {
         return (List) con.getRecords();
    }
    
     /*** Pagination control***/
    
     // indicates whether there are more records after the current page set.
    public Boolean hasNext {
        get {
            return con.getHasNext();
        }
        set;
    }
 
    // indicates whether there are more records before the current page set.
    public Boolean hasPrevious {
        get {
            return con.getHasPrevious();
        }
        set;
    }
 
    // returns the page number of the current page set
    public Integer pageNumber {
        get {
            return con.getPageNumber();
        }
        set;
    }
 
    // returns the first page of records
    public void first() {
        con.first();
    }
 
    // returns the last page of records
    public void last() {
        con.last();
    }
 
    // returns the previous page of records
    public void previous() {
        con.previous();
    }
 
    // returns the next page of records
    public void next() {
        con.next();
    }
 
    // returns the PageReference of the original page, if known, or the home page.
    public void cancel() {
        con.cancel();
    }
    
    //    
  
 /*** Pagination control***/
}

Wednesday 5 September 2012

Wrapper Class in Apex/Visual force page

Wrapper class is a very powerful concept that can be used in multiple scenarios. Putting aside the word "Wrapper" it is nothing but just a class.Just like what we have in a class ,we  have methods,Properties etc in a wrapper class too.Here is an use case for wrapper class

Requirement : A Visual force page has to display all the Contacts available for an Account .Contacts should be listed out in the table row wise(default being column wise) . Only created "date"(Strip the time part) of the contact should be displayed .

Sample page:


Apex Code :

  1. public class displayContacts  
  2.    {    
  3.         
  4.         
  5.       //Get the respective Account id  
  6.       ID accountId;  
  7.        
  8.       //Store the wrapped Contacts  
  9.       public List<contactWrapper> conWrapper{get;set;}  
  10.       
  11.      //COnstructor   
  12.      public displayContacts()  
  13.       {     
  14.          accountId= string.escapeSingleQuotes(ApexPages.currentPage().getParameters().get('id'));    
  15.        
  16.      //Initialize list  
  17.      conWrapper = new List<contactWrapper>();  
  18.      for(Contact tempCon :[select FirstName,LastNAme,Email,phone,createddate from contact where accountid=:accountid])  
  19.      {   
  20.         //create the object for the wrapper class  
  21.         contactWrapper tempWrapper = new contactWrapper(tempCon);  
  22.         conwrapper.add(tempWrapper);  
  23.      }  
  24.        
  25.        
  26.     
  27.       } //End of Constructor  
  28.        
  29.       //Wrapper class for Contact  
  30.       public class contactWrapper  
  31.       {        
  32.          public String contactName{get;set;}  
  33.          public String createdDate{get;set;}  
  34.          public string phoneC{get;set;}  
  35.          public string emailC{get;set;}  
  36.                    
  37.          public contactWrapper(Contact con)  
  38.            {  
  39.              contactName=con.FirstName+' '+con.LastName;  
  40.              createdDate=con.createddate.month() +'/'+ con.createddate.day() +'/'+ con.createddate.year();  
  41.              phoneC=con.phone;  
  42.              emailC=con.email;  
  43.                 
  44.            }//End of Wrapper constructor  
  45.    
  46.      }//End of wrapper class   
  47.            
  48.    } //End of Class  


Visual force page :
  1. <apex:page controller="displayContacts">  
  2.    <apex:pageBlock>  
  3.     <apex:pageBlockSection title="Contacts Available">  
  4.             <apex:dataTable value="{!conWrapper}" var="item1" border="1" columnsWidth="65px,100px" rowClasses="odd,even" styleClass="tableClass">  
  5.             <apex:column width="200px">  
  6.                     <table width="250" border="0">                       <tr><td><b>Name :</b></td><td>{!item1.contactName }</td></tr>                        <tr><td><b>Phone :</b></td><td>{!item1.phonec}</td></tr>                         <tr><td><b>Email :</b></td><td>{!item1.emailc} </td></tr>                        <tr><td><b>Created Date :</b></td><td>{!item1.createdDate} </td></tr>                     </table>               </apex:column>   
  7.             </apex:dataTable>  
  8.     </apex:pageBlockSection>  
  9.     </apex:pageBlock>  
  10. </apex:page>  


Result :


Huh!! now please don't catch a bug here that no values are displayed for phone. I admit i missed them..Pretty tired ...accept my apology and take it for granted :) :)

Power of wrapper is seamless .It can be used to process only the records that are selected in vf page.Click on the link for example.

http://wiki.developerforce.com/index.php/Wrapper_Class

You Want More Information about Salesforce.com Please Click Here